Social Sciences · World 5 of 8 · Years 7–8
Shaky Isles: Hazards and Getting Ready
Shake a tub of sand until it turns to soup, map the risks around your school and build a plan that could keep your whānau safe.
Big question: Aotearoa shakes, floods and sits beside the sea. How can a community understand its hazards and get ready before the next one arrives?
- You'll make
- A 'Get Ready' guide for your community: a hazard map of your school or neighbourhood with safe places and evacuation routes marked, a whānau plan and grab-bag checklist, and a two-minute Drop, Cover and Hold briefing you teach to a junior class.
- For
- Whānau at home, a junior class you teach before the next ShakeOut drill, and your local Civil Defence or regional council emergency team, who can check your map and share your guide.
- Time
- 5 weeks · 2 sessions a week
Your mission
Why it matters
Your local Civil Defence team has noticed that many families have no emergency plan and no grab bag. They have asked your class to find out which hazards could affect your area, learn from Kaikōura, Canterbury and the Esk Valley, and make a 'Get Ready' guide that whānau will actually use. You have five weeks to become the hazard experts in your community.
New Zealand sits across the boundary of two moving plates, so earthquakes are part of life here, and some coasts can be hit by a tsunami. Storms like Cyclone Gabrielle are becoming wetter as the climate warms. You cannot stop a hazard, but people can decide where to build, how to warn each other and what to do in the first few minutes. Those choices are the difference between a hazard and a disaster. Knowing what to do, and helping your whānau know too, is one of the most useful things you can learn at school.
Your first step
Tonight, ask someone at home one question: 'If an earthquake or flood happened while we were apart, where would we meet?' Write down their answer, even if it is 'I don't know'.
Make it yours
Choose a context
Same big question, three different places to explore it. Pick the one that fits your class and community.
Our school on shaky ground
Survey your own school for earthquake readiness: safe spots under strong tables, heavy things that could fall, the assembly area and how younger students would get there. Compare with Christchurch schools after 22 February 2011. Works for any school, city or country.
River, rain and floodplain
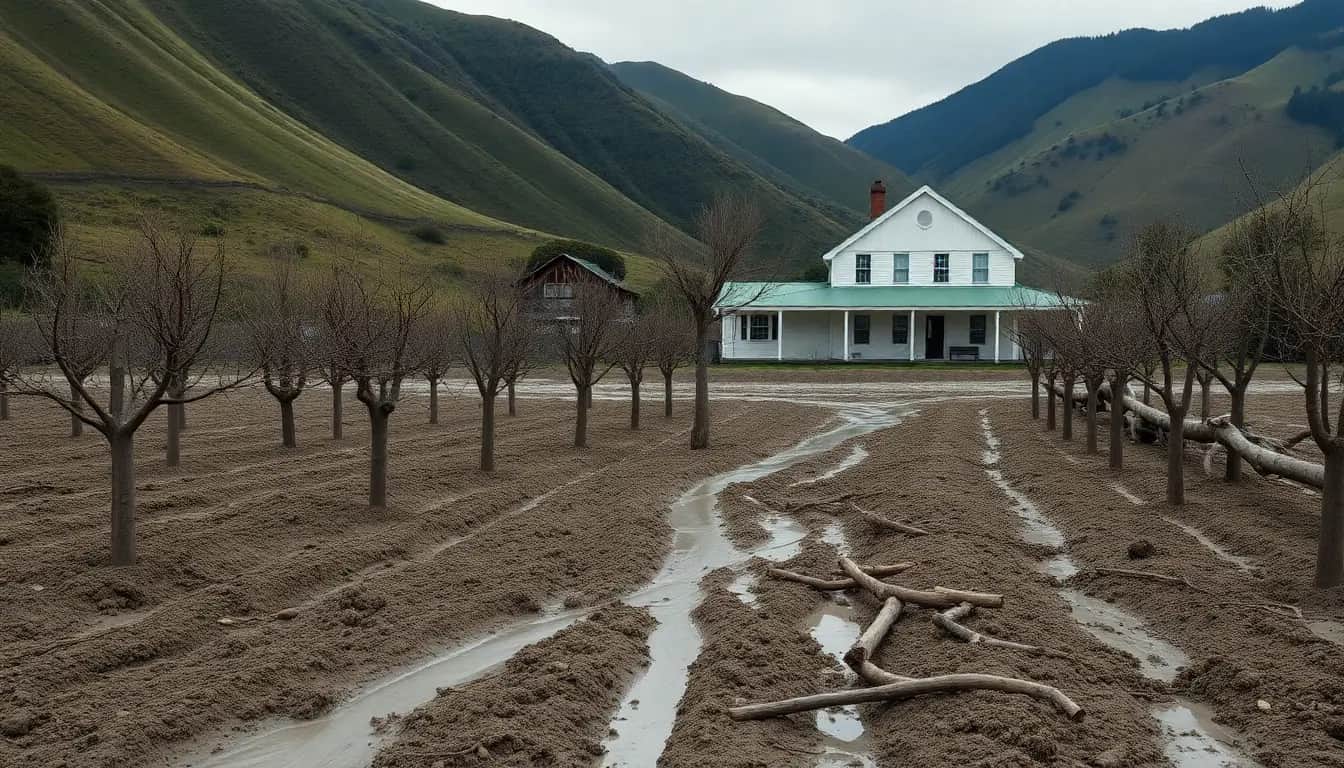
Study a town or valley that floods, such as the Esk Valley in Hawke's Bay after Cyclone Gabrielle in 2023 or Whanganui in 2015, or your own local river. Read a topographic map, find the stopbanks and think about who should live on low land. Suits rural and river-town schools.
The coast and our Pacific neighbours
Map tsunami evacuation zones on your nearest coast, learn 'long or strong, get gone', and look at how Aotearoa helps Pacific neighbours after disasters such as the 2022 Hunga Tonga–Hunga Haʻapai eruption and tsunami. Ideal for coastal schools and classes with strong Pacific connections.
TRACE
Week by week
Two sessions a week, each with Getting started and Stretch support so the whole class works together.
- W1What is a hazard, and what could happen here?Time & Place: Hazard or disaster? · Time & Place: The four Rs and our place
- W2Why does Aotearoa shake? Plates, liquefaction and tsunamiTime & Place: Living on a plate boundary · Relationships: Liquefaction and the people of Christchurch
- W3What happened? Accounts from Kaikōura, Canterbury and the Esk ValleyAccounts: Midnight in Kaikōura · Accounts: Two accounts that do not agree
- W4Why so bad? Causes, consequences and hard choicesCauses & Consequences: Rain, land and rivers · Causes & Consequences: Should people move? Managed retreat
- W5How ready are we? Make, test and share the Get Ready guideEvaluate: Judge the response · Evaluate: Teach it, test it, share it
Hands-on
Activities
Investigations and projects that fit the weeks above. Open one to see what you need and how you'll know it worked.
Four Rs hazard map of our placeWhich hazards could affect our school or neighbourhood, and where are the safe places?Open
You need: a printed map of your school or neighbourhood · coloured pens or stickers · your regional council's online hazard map · a clipboard
- Look up your area on the council hazard map. Note which layers cover it: flood, tsunami, liquefaction, landslide.
- Shade each hazard area on your printed map in a different colour and make a key.
- Walk the school in pairs. Mark the assembly area, safe spots under strong tables, and things that could fall or block a door.
- Add arrows for the safest route to higher ground or the assembly point.
- Label one action for each of the four Rs next to your map.
How you'll know: Your map shows at least two hazards, the safe places and routes, and one real action for each of the four Rs.
Safety: Stay in pairs inside the school grounds. Look, do not climb or move heavy furniture to check it.
Go further: Add four-figure grid references so a visitor could find each safe place on a Topo50 map.
Fits week 1 →Liquefaction in a tubWhy do some buildings sink or tilt when the ground shakes?Open
You need: a clear plastic tub · fine sand · water · a small brick or heavy block · a light toy house or Lego house · a ruler
- Fill the tub two-thirds with sand. Pour in water slowly until it is just below the sand's surface.
- Press the sand flat. Stand the brick and the light house on top.
- Predict what will happen when you shake the ground.
- Tap the side of the tub steadily for 30 seconds. Watch the surface and the objects.
- Measure how far the brick sank and describe what happened to the water. Repeat with dry sand and compare.
How you'll know: Shaking makes the wet sand behave like a liquid: water rises to the surface, the heavy brick sinks or tilts, and the light house may float up. Dry sand does not do this. You can link this to the eastern suburbs of Christchurch.
Safety: Work on a tray or tarp and mop spills straight away so nobody slips. Wash hands after handling wet sand.
Go further: Test whether a 'foundation' (a flat piece of card under the brick) or packing the sand down first makes a difference.
Fits week 2 →Paper-cup seismometerHow do scientists record an earthquake?Open
You need: a paper cup · string · a felt pen · a cardboard box with the top cut off · a long strip of paper (adding-machine roll or taped strips) · some coins or small stones
- Poke a hole in the bottom of the cup and push the felt pen through so the tip pokes out.
- Put coins in the cup for weight and hang it from string across the top of the box so the pen just touches the bottom.
- Lay the paper strip under the pen. One person pulls the strip slowly and steadily.
- A second person shakes the box gently, then harder. Label the calm, small and big wiggles.
- Compare your trace with a real GeoNet seismogram. What is the same?
How you'll know: Your trace is flat when still and wiggles more with stronger shaking, like a real seismogram. You can explain that many recorders in different places let scientists find where a quake started.
Go further: Look up GeoNet's latest earthquakes list and find the one nearest your school. How deep and how strong was it?
Fits week 2 →Source detectives: two accounts of the same eventHow can two honest sources tell different stories about the same hazard?Open
You need: two short printed sources about one event (a science article and a resident's account) · highlighters in two colours · a source-detective card
- Read both sources once all the way through.
- For each, fill in the card: who made it, when, why, and for whom.
- Highlight facts in one colour and feelings or opinions in the other.
- List what each source tells you that the other does not.
- Write one sentence that both sources support, and one question you would need a third source to answer.
How you'll know: You can explain why the two accounts differ (who wrote them and why) and name one fact they both support.
Go further: Find a third source, such as a photo from DigitalNZ or a GeoNet data page, and use it to check the claim you were unsure about.
Fits week 3 →Runoff trays: land cover and floodsDoes what covers the land change how much water rushes into a river?Open
You need: two identical baking trays · a sponge sheet, piece of turf or thick old towel · a plastic sheet or bin bag · a watering can and 1 L jug · two containers to catch runoff · a timer · books to tilt the trays
- Cover one tray with sponge or turf (forest and grass) and the other with plastic (roads and roofs).
- Tilt both trays at the same angle with a catch container at the low end.
- Pour exactly 1 L of 'rain' over each tray from the same height over 30 seconds.
- Time how long until water starts to run off, and measure how much you catch after two minutes.
- Repeat twice to check your results and work out the average.
How you'll know: The plastic tray sheds water faster and more of it. You can use your data to explain why cleared hills and concrete make floods rise faster, and why keeping forest and wetlands helps.
Safety: Do this outside or on a tarp. Mop up spills at once and keep water well away from power points.
Go further: Add a strip of 'riverbank planting' (sponge) at the bottom of the plastic tray. Does it slow the water?
Fits week 4 →Managed retreat hui (role-play)When a place keeps flooding, who decides whether people should move?Open
You need: role cards (farmer, kuia, council engineer, insurer, young family, orchard worker, local business owner) · a map of a made-up river valley · a talking stick or token
- Read your role card. Note what your person values most and what they fear losing.
- Hold the hui: each role speaks for one minute without interruption.
- Mark on the map which houses are at highest risk.
- As a group, choose an option: build a bigger stopbank, raise houses, move some homes, or move the whole settlement. Record who agrees and who disagrees, and why.
- Step out of role and write what would be lost and gained by your choice.
How you'll know: You can explain what managed retreat is, give two different viewpoints fairly, and justify your group's choice with evidence.
Go further: Find out what 'Category 3' land meant in Hawke's Bay after Cyclone Gabrielle, and how it compares with Christchurch's red zone.
Fits week 4 →Grab bag and whānau planWhat would your household need for three days without power, water or shops?Open
You need: the Get Ready plan template · a grab-bag checklist · a backpack and things from home (optional)
- Talk with your whānau about where you would meet if you were apart, and who outside your town everyone would contact.
- Plan how you would store enough water (about 3 litres per person per day for at least three days).
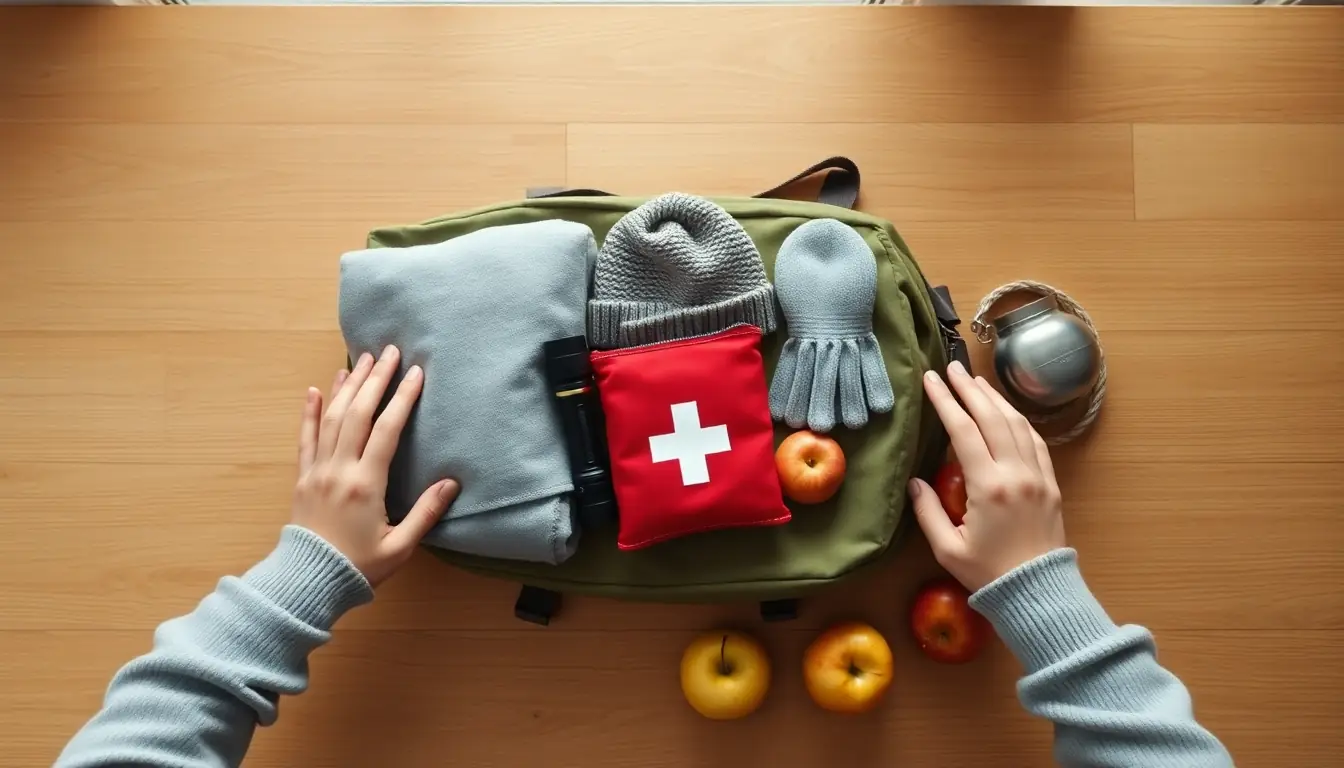
- Tick off what your household already has: torch, radio, batteries, first aid kit, warm clothes, medicines, food that needs no cooking, pet supplies.
- Choose three missing items and a way to get them cheaply.
- Put the plan on the fridge and set a date to check it in six months.
How you'll know: Your household has a written plan with a meeting place, an out-of-town contact, a water plan and a list of what to add to the grab bag.
Safety: Do not include anything sharp or dangerous for a young child to reach. Medicines stay with adults.
Go further: Add a section for someone in your household with extra needs, such as a baby, a pet or a person who uses a wheelchair.
Fits week 4 →Teach Drop, Cover and HoldCan you teach a younger class what to do when the ground shakes?Open
You need: your briefing script · picture cards for Drop, Cover and Hold · a junior classroom with tables
- Write a two-minute script in simple words: why we drop, why we cover our head and neck, why we hold on.
- Practise with a partner, then with a group pretending to be six-year-olds.
- Teach the junior class and run one practice drill with them.
- Ask the teacher and two students one question each about what they learned.
- Improve one part of your script based on what they said.
How you'll know: The junior students can show Drop, Cover and Hold correctly and say one reason for it.
Safety: No running or pushing. Only practise under strong tables, and follow the junior teacher's class routines.
Go further: Adapt your script for someone who cannot drop to the floor, using Get Ready's advice.
Fits week 5 →Look closer
From the real world
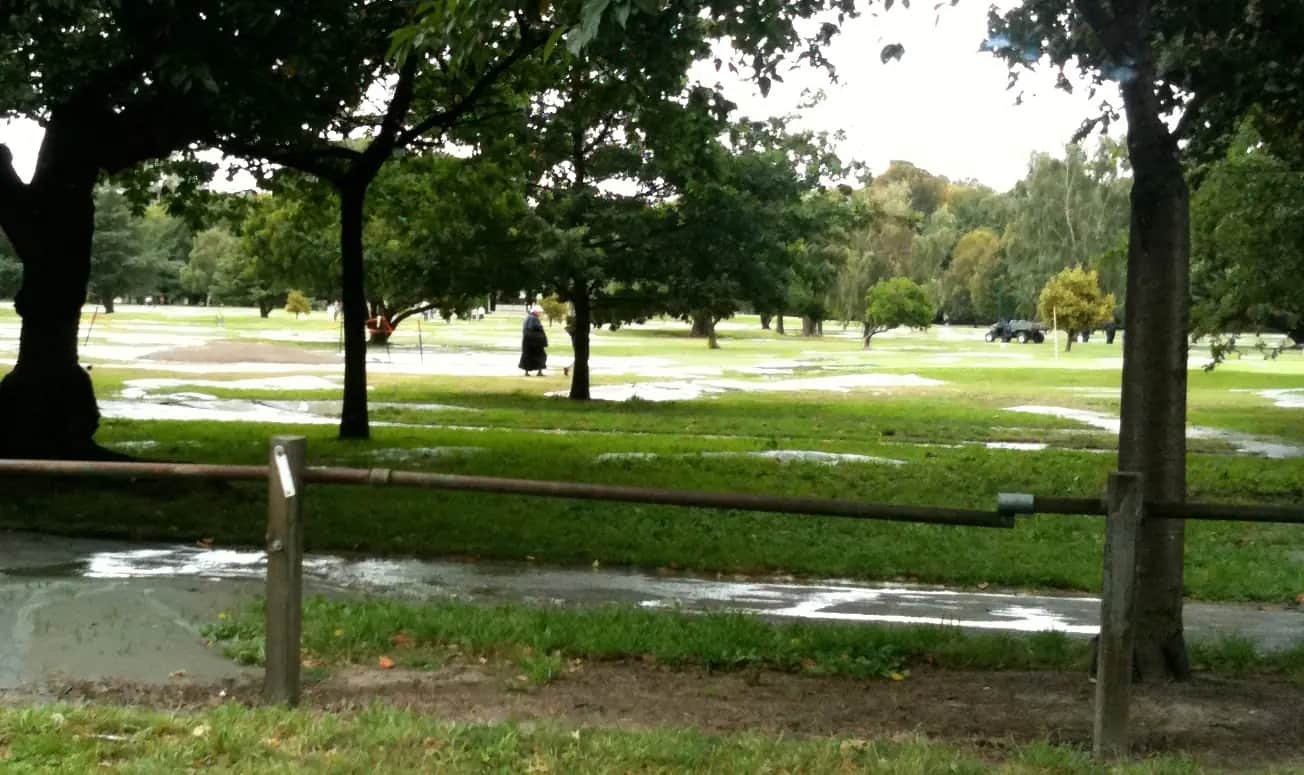
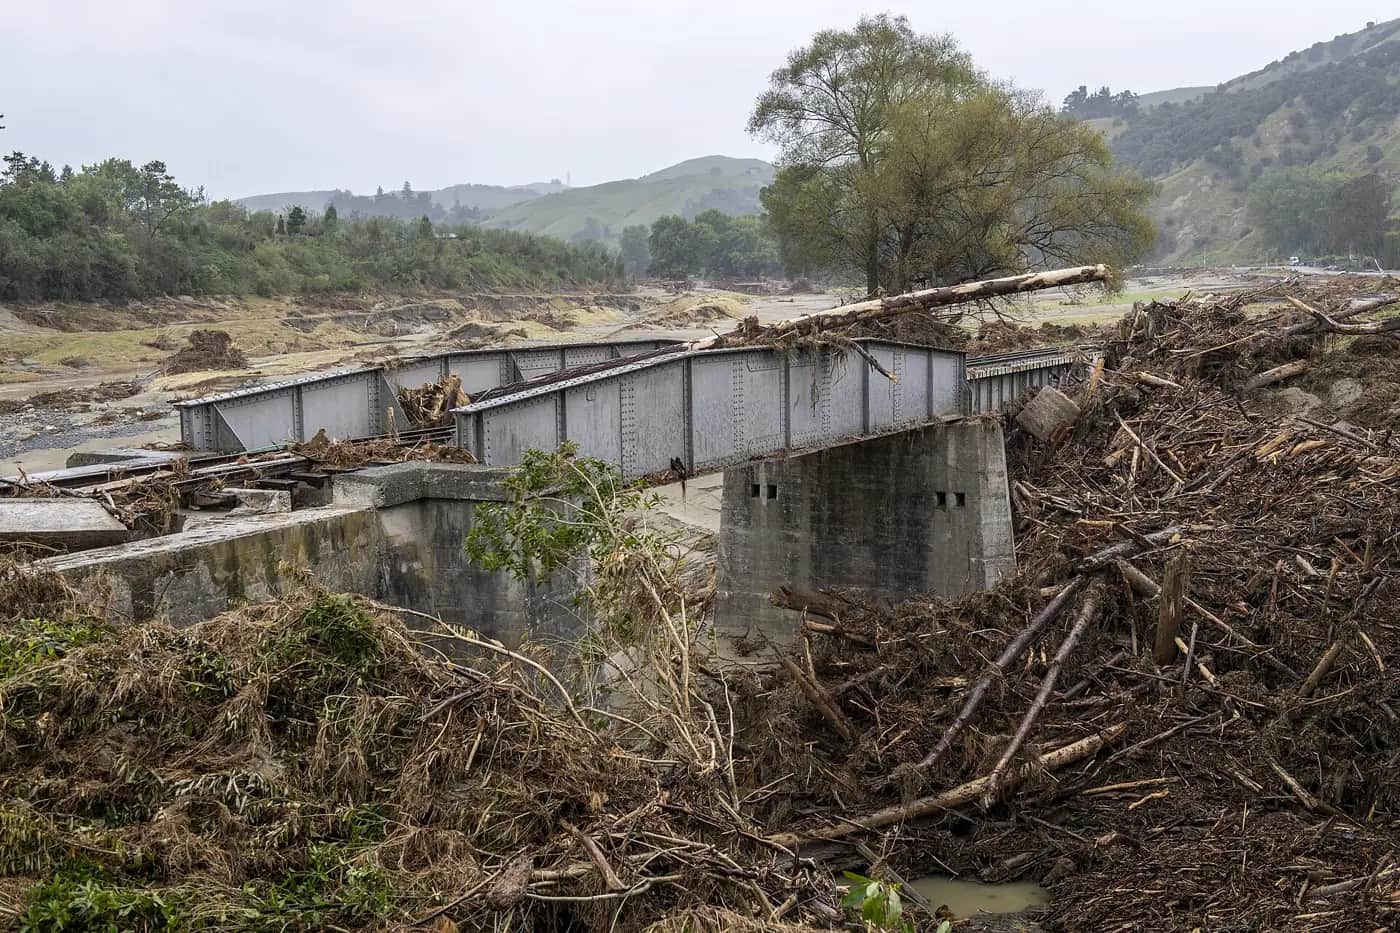
Background reading
Read to understand
Short readings written for Kōkiri Learn students, with their sources.
- Why Aotearoa shakes: plates, liquefaction and tsunamiNew Zealand sits where two giant plates meet. That is why we have earthquakes, why some ground turns to liquid, and why some coasts face tsunami.
- Two earthquakes, two stories: Canterbury and KaikōuraThe Canterbury earthquakes and the Kaikōura earthquake taught New Zealand hard lessons about where we build, how we help each other and how we recover.
- Cyclone Gabrielle, the Esk Valley and the four RsIn February 2023 a cyclone flooded the Esk Valley and much of the east coast. It shows how land, rain and planning decide how bad a hazard becomes.
Trusted NZ sites
Explore more
Placed at the stage of the journey where each one helps.
Time & Place
Natural hazards and disasters ↗Te Ara – The Encyclopedia of New Zealand
An overview of the hazards Aotearoa faces and where they happen.
Time & Place
Under the Earth's surface ↗Science Learning Hub
How moving plates under New Zealand cause earthquakes and volcanoes.
Time & Place
Earthquakes topic ↗Science Learning Hub
Articles, videos and activities on earthquakes and the people who study them.
Relationships
Historic earthquakes ↗Te Ara – The Encyclopedia of New Zealand
How communities from Napier in 1931 to Christchurch lived through big earthquakes.
Relationships
AF8: Alpine Fault magnitude 8 ↗AF8 programme
How South Island communities are planning together for a large Alpine Fault earthquake.
Accounts
Kaikōura earthquake ↗Science Learning Hub
What happened in 2016: faults, uplift, landslides and the small tsunami.
Accounts
M7.8 Kaikōura earthquake story ↗GeoNet
The monitoring agency's own account, with maps and data.
Accounts
Christchurch earthquake kills 185 ↗NZ History
A short, careful account of 22 February 2011 and what followed.
Causes & Consequences
In the wake of Gabrielle ↗NIWA – Earth Sciences New Zealand
Why Cyclone Gabrielle's rain and floods were so severe, and how forecasts were used.
Causes & Consequences
Floods ↗Te Ara – The Encyclopedia of New Zealand
Why New Zealand rivers flood and how people have tried to control them.
Causes & Consequences
Managed retreat ↗Ministry for the Environment
What managed retreat means and how the government is approaching it.
Evaluate
Drop, Cover and Hold ↗Get Ready – National Emergency Management Agency
The official action to take in an earthquake, and why it works.
Evaluate
Tsunami ↗Get Ready – National Emergency Management Agency
Natural warning signs and 'long or strong, get gone'.
Evaluate
Make a plan ↗Get Ready – National Emergency Management Agency
A step-by-step household emergency plan to use for your whānau plan.
Evaluate
Building an earthquake-ready future ↗Science Learning Hub
How engineers and communities reduce earthquake damage, to judge your own ideas.
Real audiences
- Whānau at home, who use your plan and grab-bag checklist
- A junior class, who learn Drop, Cover and Hold from you before the next ShakeOut
- Your local Civil Defence emergency management group or regional council, who can check your hazard map
- The school board or leadership team, who can act on your school readiness survey
Work with other schools
- Pair with a school in a different hazard setting (for example, a Christchurch school and a Hawke's Bay school) and swap hazard maps and case studies over a video call.
- Run the same class readiness survey in two schools and compare the results in a shared spreadsheet.
- Take part in the national ShakeOut drill on the same day as a partner school and share what each class learned.
Stretch challenges
- Graph GeoNet's aftershock counts after the Kaikōura earthquake as a time series and explain the pattern.
- Compare how New Zealand and a Pacific neighbour prepared for and responded to the same cyclone, and how New Zealand helped.
- Find out how base isolation (buildings on rubber and lead bearings) protects Te Papa and Wellington's Parliament buildings in an earthquake.
- Research the 1931 Hawke's Bay earthquake and compare the recovery of Napier with the recovery of Christchurch.
- Explore AF8 and design a poster explaining the Alpine Fault to tourists visiting the West Coast.
New Zealand Curriculum
What this world covers
Mapped to the refreshed Phase 3 statements. The whole class covers both the Year 7 and Year 8 sequences over two years.
Social Sciences · Geography
Natural hazards and the four Rs (Reduction, Readiness, Response, Recovery); direct and indirect impacts; managed retreat as a long-term reduction choice
Year 8 sequence
Social Sciences · Geography
Earthquakes: plate movement, liquefaction, tsunami and personal response (Drop, Cover and Hold), with Canterbury 2010–11 and Kaikōura 2016 as case studies
Year 8 sequence
Social Sciences · Geography
Rainfall, land cover, stopbanks, forecasting and warnings, and reading topographic maps and grid references, through Cyclone Gabrielle and the Esk Valley
Year 8 sequence
Social Sciences · Civics and society
What councils do: civil defence, flood protection and hazard maps paid for by rates, and how communities take civic responsibility for each other
Year 7 sequence
Mathematics and Statistics · Statistics
Time-series graphs of aftershocks from GeoNet data, and dot plots of the class readiness survey
Year 8 sequence
Health and Physical Education · PE: outdoor education
Basic survival skills and shared responsibility: grab bags, meeting places and looking after younger students in an emergency
Year 8 sequence
For teachers: how to run it
This world teaches the Phase 3 Year 8 Geography content on natural hazards (the proposed Social Sciences statement of August 2026): the four Rs of Reduction, Readiness, Response and Recovery; earthquakes, plate movement, liquefaction and tsunami; rainfall, land cover, stopbanks, forecasting and warnings; direct and indirect impacts; personal response (Drop, Cover and Hold); and managed retreat, using the Cycle B case studies of Cyclone Gabrielle and the Esk Valley (2023) and the Canterbury earthquakes (2010–11), with Kaikōura (2016) for monitoring. Year 7 students in a combined class get a strong grounding in map reading, cause and consequence and civic responsibility, and it pairs well with Te Awa Tupua (river systems and floods) in this subject. Wellbeing first: some students or whānau lived through Canterbury, Kaikōura or Gabrielle, or have family in the Pacific affected by cyclones and tsunami. Tell whānau before you start, avoid graphic footage and death tolls as a hook, give students a way to step out, and never ask a child to retell their own experience in front of the class. Focus on agency: what people did, and what we can do. Prep: clear plastic tubs, fine sand, water, a small brick or heavy block, toy houses or Lego, paper cups, string, felt pens and long paper strips for the seismometer, two trays with sponge, turf or towel and plastic sheet for the runoff test, a watering can, printed topographic maps of your area (LINZ Topo50 sheets are free online) and your council's hazard maps (flood, tsunami and liquefaction layers are on most regional council GIS viewers). Safety: water activities on a tarp with spills mopped at once; no running in drills; outdoor surveys in pairs within the school boundary; nobody climbs to check shelves. Protocols: practise Drop, Cover and Hold using your school's own emergency procedures, and invite your local Civil Defence emergency management group, regional council or Fire and Emergency to answer questions in week 5. Rūaumoko, the atua of earthquakes and volcanoes, is part of mātauranga Māori; accounts vary between iwi, so invite mana whenua or your school's iwi partners to share their own kōrero if they wish, and do not ask students to invent pūrākau. The managed-retreat role-play touches real losses: frame it around a made-up valley, not a real family. Differentiation: a partly drawn hazard map and a four-Rs sorting card set with pictures; stretch students with GeoNet aftershock data graphed over time, grid references on a Topo50 map, or a comparison of how a wealthy and a less wealthy country prepare for the same hazard. Misconceptions to listen for: 'scientists can predict earthquakes' (they can say how likely one is, not when), 'stand in a doorway' (Drop, Cover and Hold is the right action in New Zealand), and 'a stopbank makes you completely safe' (bigger floods can go over or through them). Kōkiri Lab link: the Earth Systems and Space world goes deeper into plate tectonics, and the Permaculture Design Course modules on water and topography show how land cover and slope change how fast water runs off.
Plan this world into any term with the two-year planner. Students can record their thinking in their Kōkiri Learn portfolio.
More Social Sciences worlds
 4 weeksTō Mātou Rohe: Stories of Our Place
 5 weeksMana Motuhake: Power, Decisions and People
 5 weeksTe Awa Tupua: Rivers, Floods and People
 5 weeksWhy We Move: Migration and Belonging
 5 weeksSilk Roads and Sea Routes: When Worlds Trade
 5 weeksStanding Up: Civil Rights and Youth Voice
 5 weeksOur Money, Our Community
Ready to run it with your class?
Free trial for NZ schools. One combined Years 7–8 class, any term.